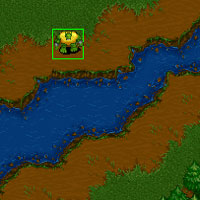
Hopping peons across water
Early on in Warcraft 2's life, players discovered that they could safely build their
foundries up rivers on High Seas Combat, where they would be safe from enemy ships. Once in awhile, the peons
would end up on the opposite shore, after the building was completed. This was incredible.
You could get peons to another island, without ever building a transport. With some experimentation,
it was soon realized that peons follow the same popping order that units do. You could place your foundry
in a specific spot, in order to get your peon across the river. It was also discovered that you
didn't even need to let your building finish. You could just cancel it as soon as it was started
to cause your peon to 'hop' across the river.
Now in the modern days of playing this game, hopping has become a major part of the game. If you don't know how to hop on High Seas Combat, you will not compete with the best players. It has also evolved to a whole new level. No longer is hopping just used across narrow rivers, it is used on all sorts of maps (water and land), across large areas.
Across narrow rivers
Understanding how hopping works depends completely on your knowledge of how
unit's popping order. If you are unfamiliar with that, I strongly suggest you read that page first.
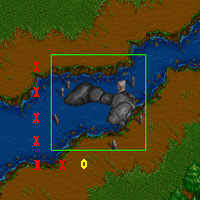
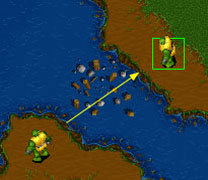
Hopping a narrow river is very simple. On a map like High Seas Combat (not the BNE version), you can hop almost any river with just 1 peon. The following pictures shows the 3 steps in hopping across a river.
|
|
|
|
Hopping a narrow river - 2 peons required
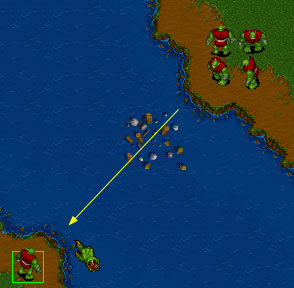
Unfortunately, it can get a little more complicated, even on High Seas Combat. When you
are trying to hop towards the top of the screen, it can become more difficult because of the
order that peons come out of the cancelled or completed building. It becomes even harder when you
try to hop a peon directly to the top right of where he is.
|
|
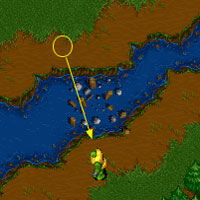
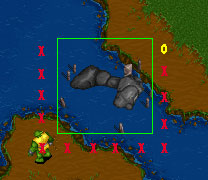
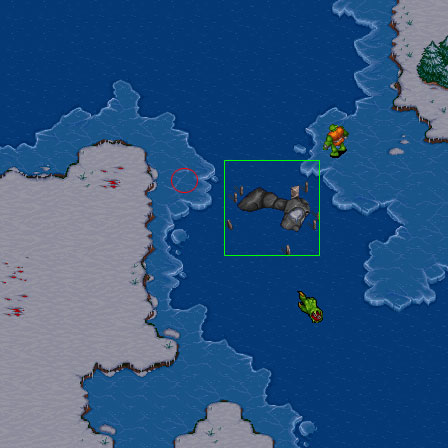
Hopping large rivers
The building that you use to hop across a river doesn't even have to be touching the other shore. If it doesn't touch the shore, it just means
it will require more peons to block spots, from where you are hopping from. The following is the well known hop from the right side on X Marks
the Spot. Don't be confused by the first picture. I will explain it below.
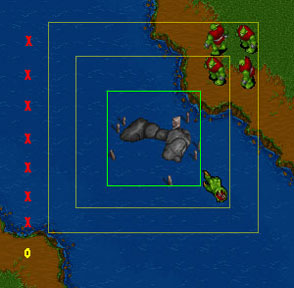
|
|
I hope you understood all that. After playing this game for many years, can I finally recognize hops across large areas without having to test them out. In an in-game situation, imagining squares is a quick way to see if a hop will work.
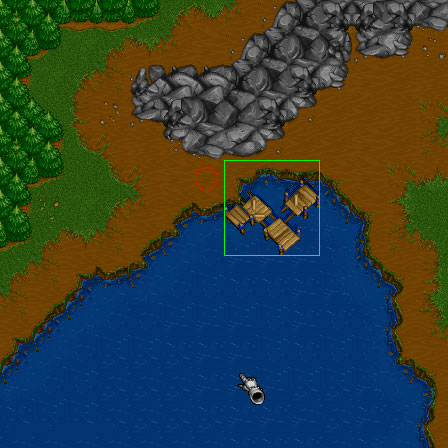
Some famous examples
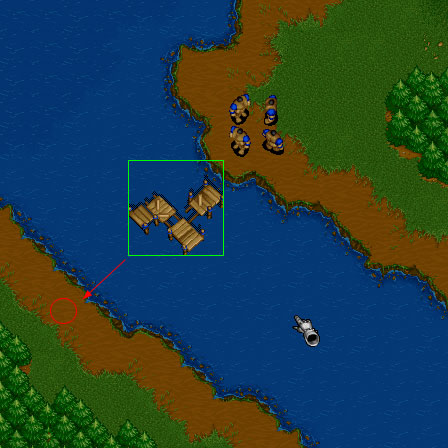
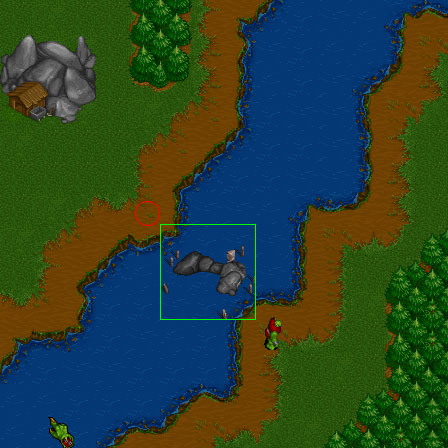
The red circles in all of these examples, represent where the peon will hop to once the building is cancelled.
| Click to enlarge (51k) | Click to enlarge (48k) |
High Seas Combat - Top Right |
High Seas Combat BNE - Mid Right |
| Click to enlarge (37k) | Click to enlarge (55k) |
Continent to Explore - Bottom Left |
Dark Peninsula - Top Left |
Which building should you use?
Remember that each building you cancel, costs you 1/4 of the resources, that it originally cost to start that building.
If you don't have a shipyard already, the only option you have is to use a shipyard (mill permitting). If you have a shipyard completed
anywhere else on the map, then you have a choice. Cancelling a shipyard will cost you 200 gold and 113 wood. Cancelling a foundry will
set you back 175 gold, 100 wood, and 100 oil. The refinery costs you 200 gold, 88 wood, and 50 oil.
If you have the luxury of this option, then it is probably best to go with a refinery. The wood is more important because it takes that much longer to get. Use the shipyard if it is your only option, or if the 50 oil for cancelling the refinery will put you under the amount of oil you need for something important (like a fortress upgrade).
Back (Hopping-Basics) | Top | Forward (Land hopping) [an error occurred while processing this directive]